← All articles · Photo editing course · Part 3 of 12 · about 3 min read
Crop, straighten, resize: the three moves you will make most (Part 3)
Cropping is the highest-value edit in photography. No filter rescues a photo with a distracting half-wall along one edge, and no amount of sharpening fixes a horizon that is two degrees off. This part is about getting the frame right first, because everything you do after inherits that decision.
Crop with a purpose, not a habit
Press C and the options bar gives you a ratio field. Type 1:1 for a profile picture, 4:5 for an Instagram portrait, 16:9 for a video thumbnail, or leave it empty to drag freely. Hold Shift while dragging to keep the current ratio.
Before you drag, decide what the picture is about. A portrait crop that keeps both eyes on the upper third line reads as intentional; a crop that cuts a wrist at the joint reads as an accident. Avoid slicing through joints, and leave more space in front of a moving subject than behind it.
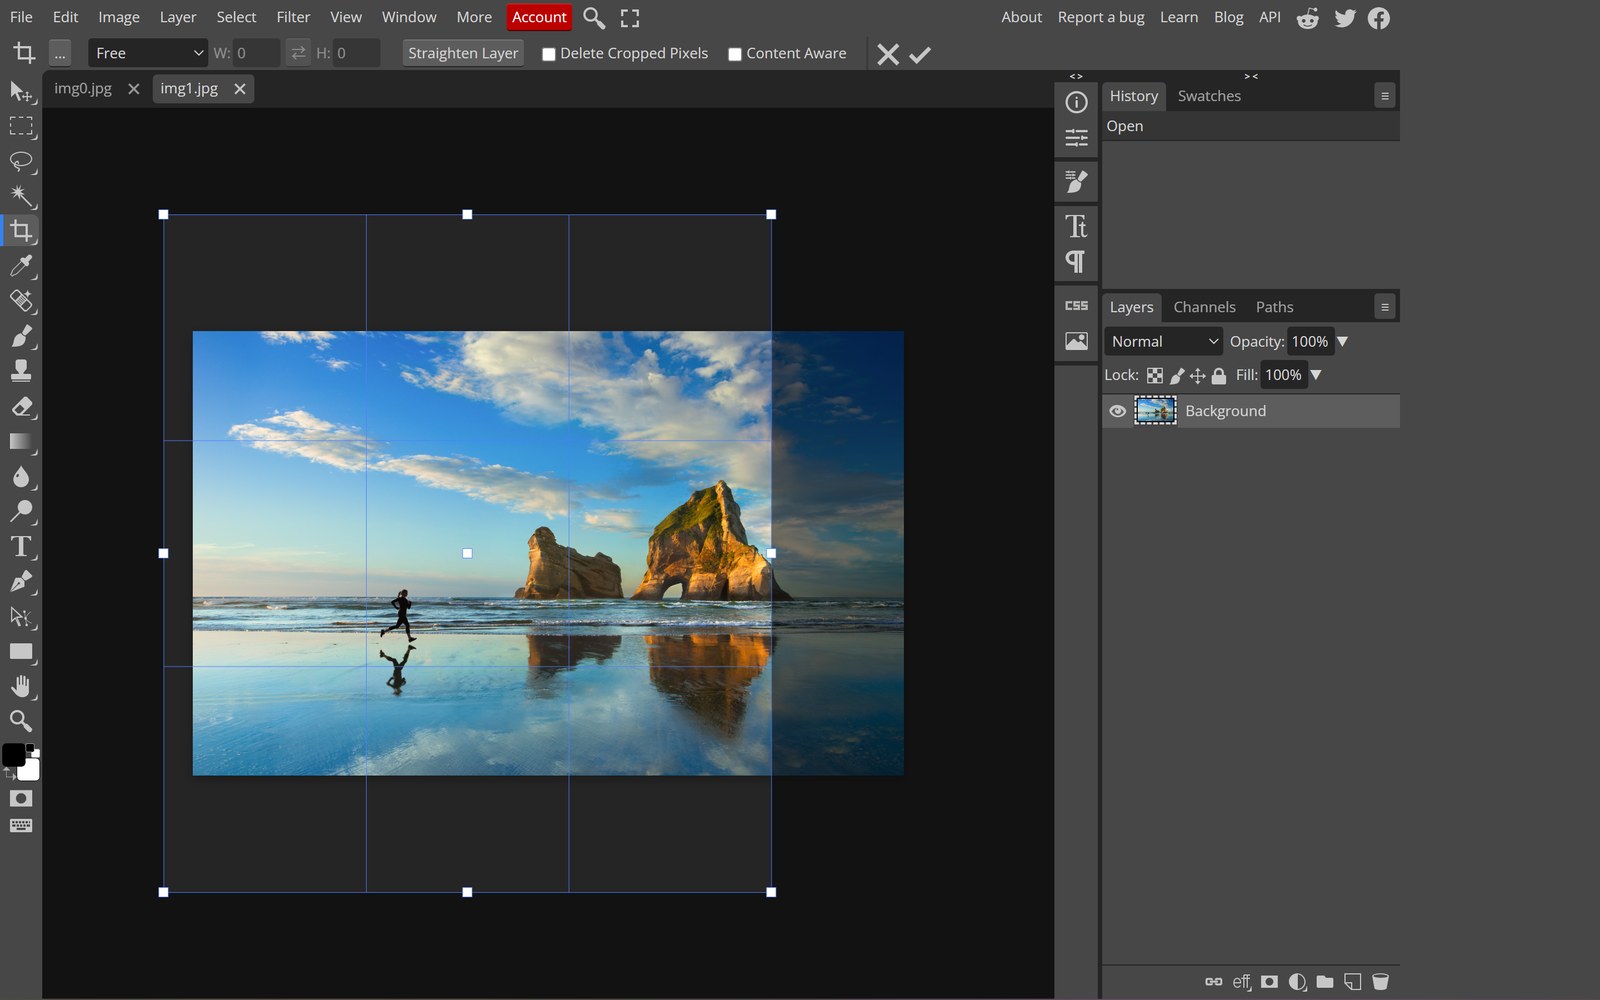
Straighten: the two-degree fix that changes everything
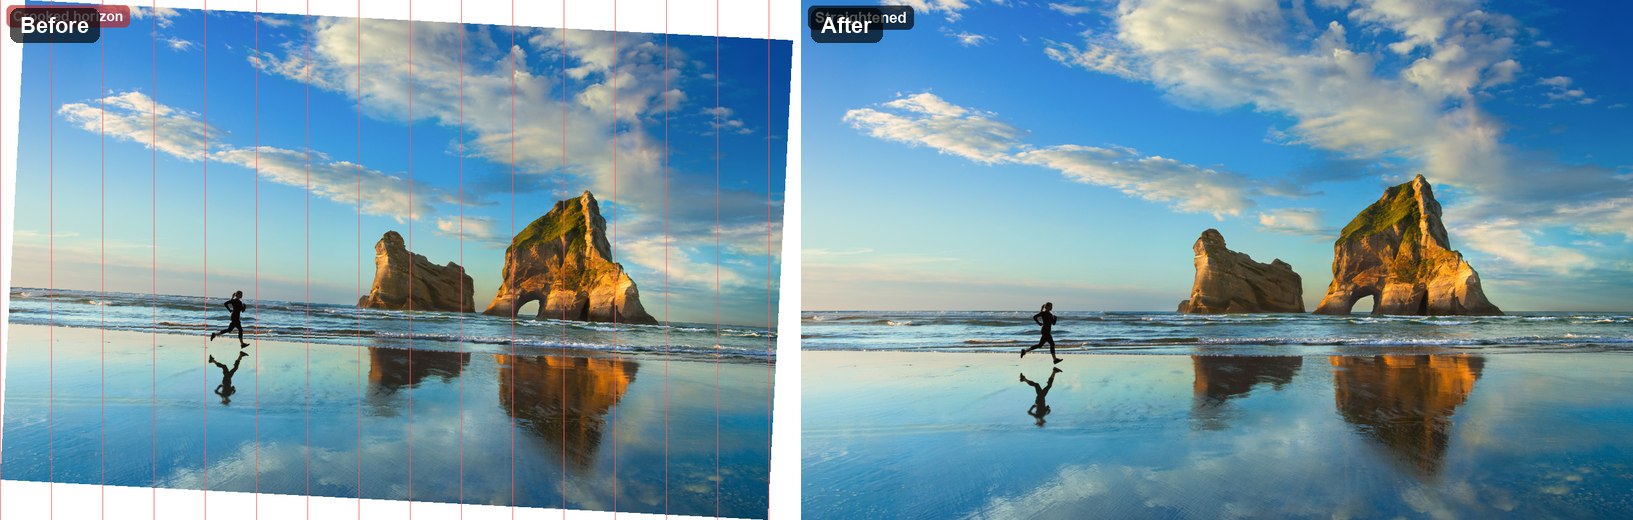
With the crop tool active, click Straighten and drag a line along something that should be level — a horizon, a door frame, the edge of a table. The canvas rotates to match and the crop box stays level. Two degrees of correction is usually the difference between "phone snapshot" and "photograph".
For a scanned document, straighten by dragging along a text baseline. If the scan is heavily skewed, rotate first with Image › Image Rotation › Arbitrary, then crop away the resulting triangular corners.
Resize once, from the largest master
Keep one master file at the biggest size you will ever need, and export down from it. Downscaling is safe and even improves apparent sharpness. Upscaling invents pixels — and the editor has to guess, which is why a 600-pixel photo blown up to 3000 looks like it was photographed through a sock.
If you must enlarge, keep it under about 1.5× and apply a light sharpening pass afterwards (Filter › Sharpen › Unsharp Mask, amount around 60%, radius 0.8). Beyond 2×, use a dedicated AI upscaler rather than a resample.

Sizes that actually fit the web
A full-width hero image: 1600 px on the long edge. In-article photo: 800–1000 px. Thumbnail or card: 400 px. Email header: 600 px. These are the numbers that keep pages fast; anything larger is bandwidth you are paying for and your visitor is waiting on.
After resizing, run the file through the image compressor — going from 1600 px to a 180 KB JPG is usually a bigger win than any filter you could apply.
Crop for people, not platforms
The same photo often needs three frames: square for the shop listing, 4:5 for social, 16:9 for a banner. Do not squash one into the other. Crop each from the master with the subject repositioned — the crop tool lets you drag inside the box to slide the frame without changing its size, which is far faster than starting over.
Tools used in this part
❓ Frequently asked questions
Does cropping reduce quality?
Cropping itself only discards pixels outside the frame; the remaining pixels are untouched. Quality drops if you then enlarge the crop back to the original size, because that is upscaling.
Why does my crop look blurry after export?
Usually you cropped a small region and then upscaled it, or exported at a low JPEG quality. Crop from the largest master and export at quality 80 or above.
How do I crop without changing the aspect ratio?
Type the ratio into the crop options bar, or hold Shift while dragging the handles.