← All articles · Photo editing course · Part 11 of 12 · about 3 min read
Exporting: choosing the right format and the right quality (Part 11)
You can do a flawless edit and lose it all at export — a 4 MB PNG where a 180 KB JPG would look identical, or a JPG of a logo with a grey box where the transparency used to be. Export is the last decision and it deserves thirty seconds of thought.
Pick the format by what the image must do
JPG for photographs. No transparency, small files, universally supported — the correct default for anything with continuous tone. PNG when transparency matters: logos, cutouts, screenshots with sharp text. WebP for the web when you control the platform: 25–35% smaller than JPG at the same visual quality, with transparency support.
PDF for documents and print handoff, PSD when another designer needs your layers, SVG only for vector artwork, never for photos.
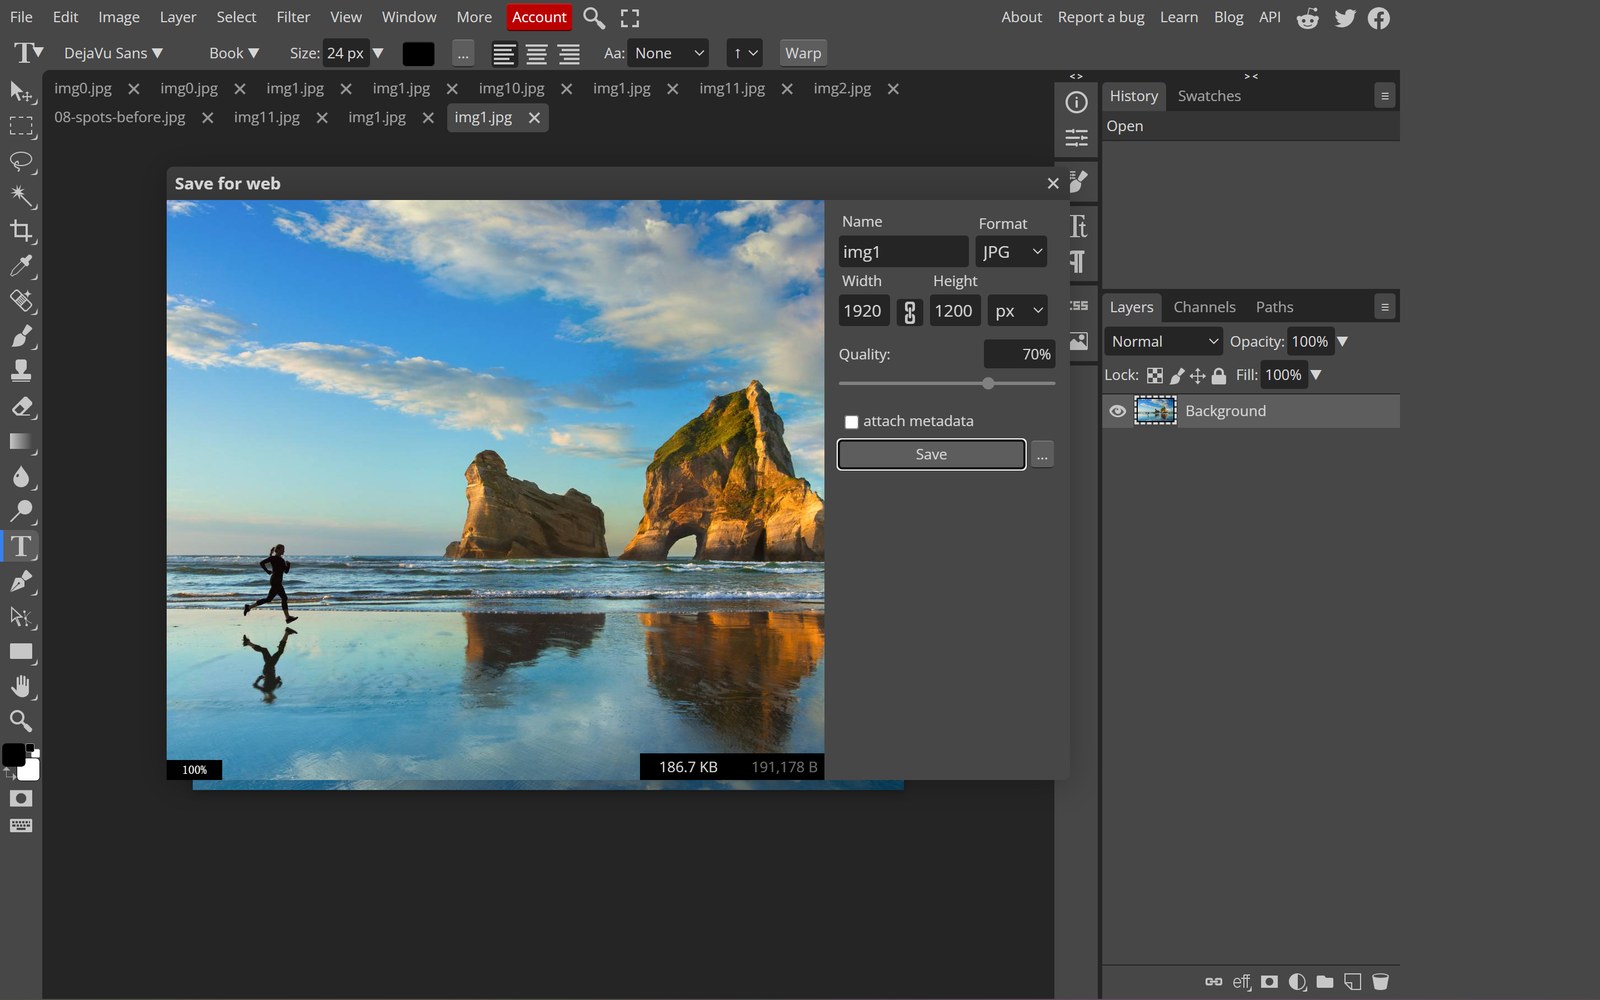
What the JPG quality slider really does
Quality controls how aggressively the compressor discards fine detail. Below about 70 you start seeing blocky patches around high-contrast edges; above 85 you are mostly adding bytes, not visible quality. 80–85 is the sweet spot for photographs.
Export the same image at 85 and 100 and compare file sizes — it is usually three to five times larger for no visible difference. That is a bad trade on any website.
Transparency: the PNG trap
JPG has no alpha channel. Export a cutout as JPG and the transparent area becomes white, which is fine on a white page and a disaster on a coloured one. If the background must be see-through, the answer is PNG or WebP — no settings will save a JPG.
Also watch matte settings when exporting PNG from a layered file: a white matte fades dark edges. Set it to none for a clean cutout.
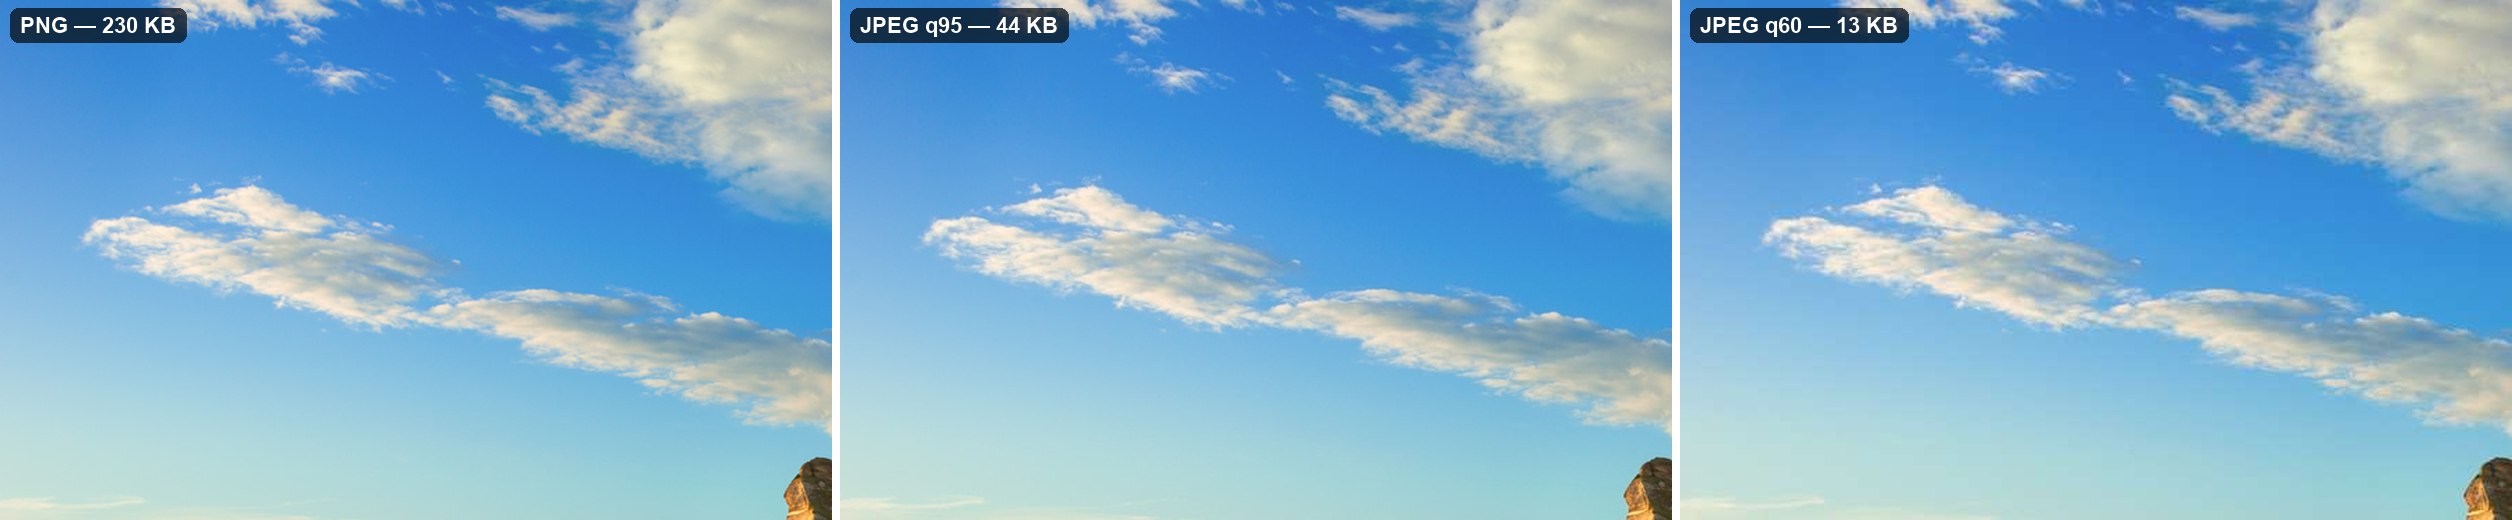
File-size targets worth memorising
Hero image on a website: under 200 KB. In-article photo: under 120 KB. Thumbnail: under 40 KB. Product image for a marketplace: usually 500 KB–2 MB depending on the platform's limit.
If a photo will not fit, do not drop quality to 40 — resize first (Part 3), then export at 82. Resizing and compressing are two different levers, and resizing is the one that keeps the image looking good.
Colour profile and the washed-out surprise
Export in sRGB unless a print house explicitly asks for CMYK or Adobe RGB. sRGB is what browsers, phones and social platforms assume; sending them a wide-gamut file is why colours sometimes look dull after upload.
If an exported image looks different from the editor, check two things: the colour profile embedded, and whether the viewer is applying its own colour management. sRGB export removes almost all of this ambiguity.
Tools used in this part
❓ Frequently asked questions
Best format for Instagram?
JPG at quality 85, sRGB, sized to 1080 px on the short edge for a square or portrait post. Instagram re-compresses everything, so a huge PNG gains nothing.
PNG or JPG for screenshots?
PNG. Screenshots contain sharp text and flat colours, exactly where JPG produces visible ringing. PNG also keeps them crisp when zoomed.
Does the editor support CMYK?
It can open CMYK files but works in RGB. For real print production, convert to CMYK in a print-oriented tool after your colour edit is final.